Squarespace Hack: Using Kit (formerly ConvertKit) with Promo Pop-ups
Squarespace’s promotional pop-ups are a fantastic marketing tool for growing your email list through your website.
Pop-ups tend to perform much better than other lead capture methods, like embedded forms or banners, because they’re more likely to catch your viewer’s attention.
I know we’ve all seen the obnoxious pop-ups that visually scream at you or make finding the exit button like Where’s Waldo, but there is a tasteful way to use promo pop-ups without annoying your visitors. And they really are one of the best ways to grow your audience.
Previously, I used a custom coded pop-up on my website that linked to Kit (formerly ConvertKit) because Squarespace didn’t have the option yet. (I’ve since switched to Flodesk.) The problem with that was that I had limited control over how it looked and functioned…
The fonts didn’t match the rest of my website (which is enough to make any brand designer’s eye twitch!) and I couldn’t tell it to stop showing to the same person after they closed it the next time they visited—which is getting into that obnoxious pop-up territory. ☺
Squarespace’s promotional pop-ups give you multiple options for layout, styling, and functionality. The only problem is that it only shows options for connecting the form to Squarespace Email Campaigns, MailChimp, or Google Drive. What if you use Kit, ActiveCampaign, or another email marketing service?
Thankfully, there is a way to hack it! And even better: no code is needed.
For this hack, you will need a Squarespace website, a Kit account (they offer a free plan for up to 10,000 subscribers!), Google Drive, and a free Zapier account.
Let’s get started…
Here’s how to connect Kit to Squarespace promotional pop-ups
1) Create your pop-up in Squarespace
Log in to your Squarespace account and click the search icon in the left-hand menu and type ‘Promotional Pop-up’ to bring up the settings to create a custom pop-up overlay directly in your Squarespace site.
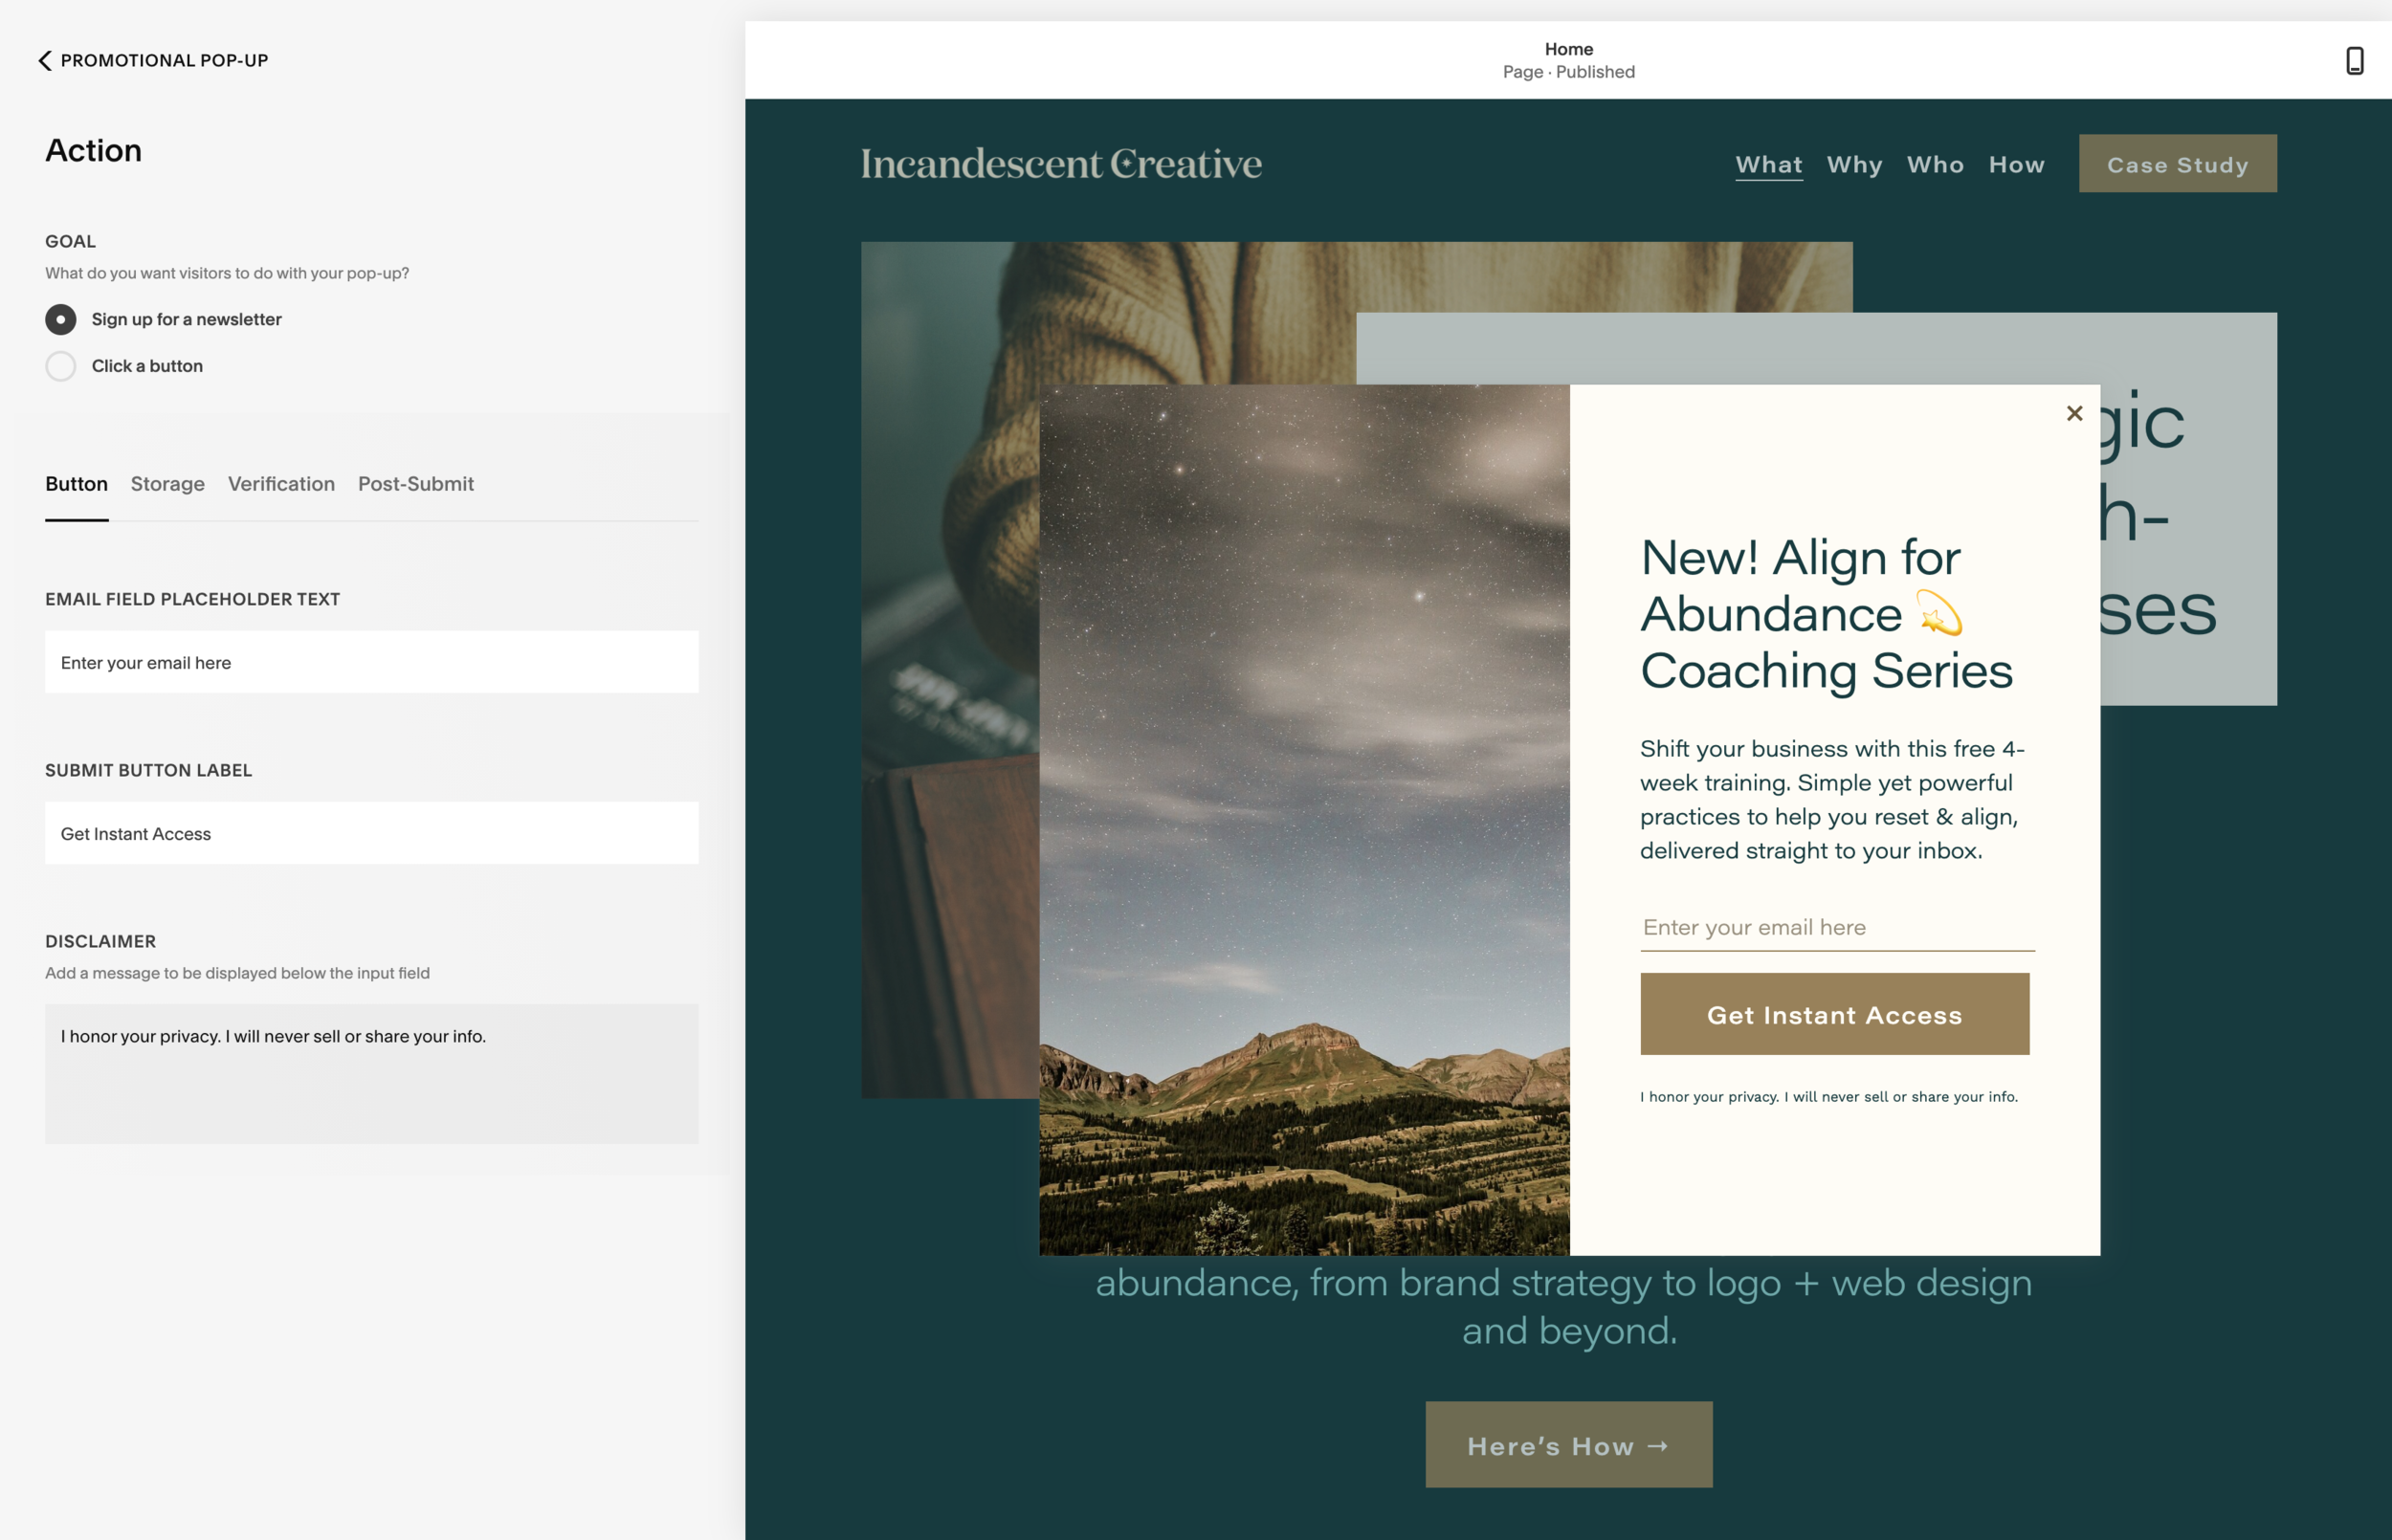
Set up your popup by selecting the layout, entering your content, adjusting the settings, and styling it to reflect your brand.
Once it looks and functions the way you want it to, click ‘Action’ and ‘Sign up for a newsletter’ under ‘Goal.’ Then enter your placeholder text, button label, and disclaimer.
2) Connect to Google Drive
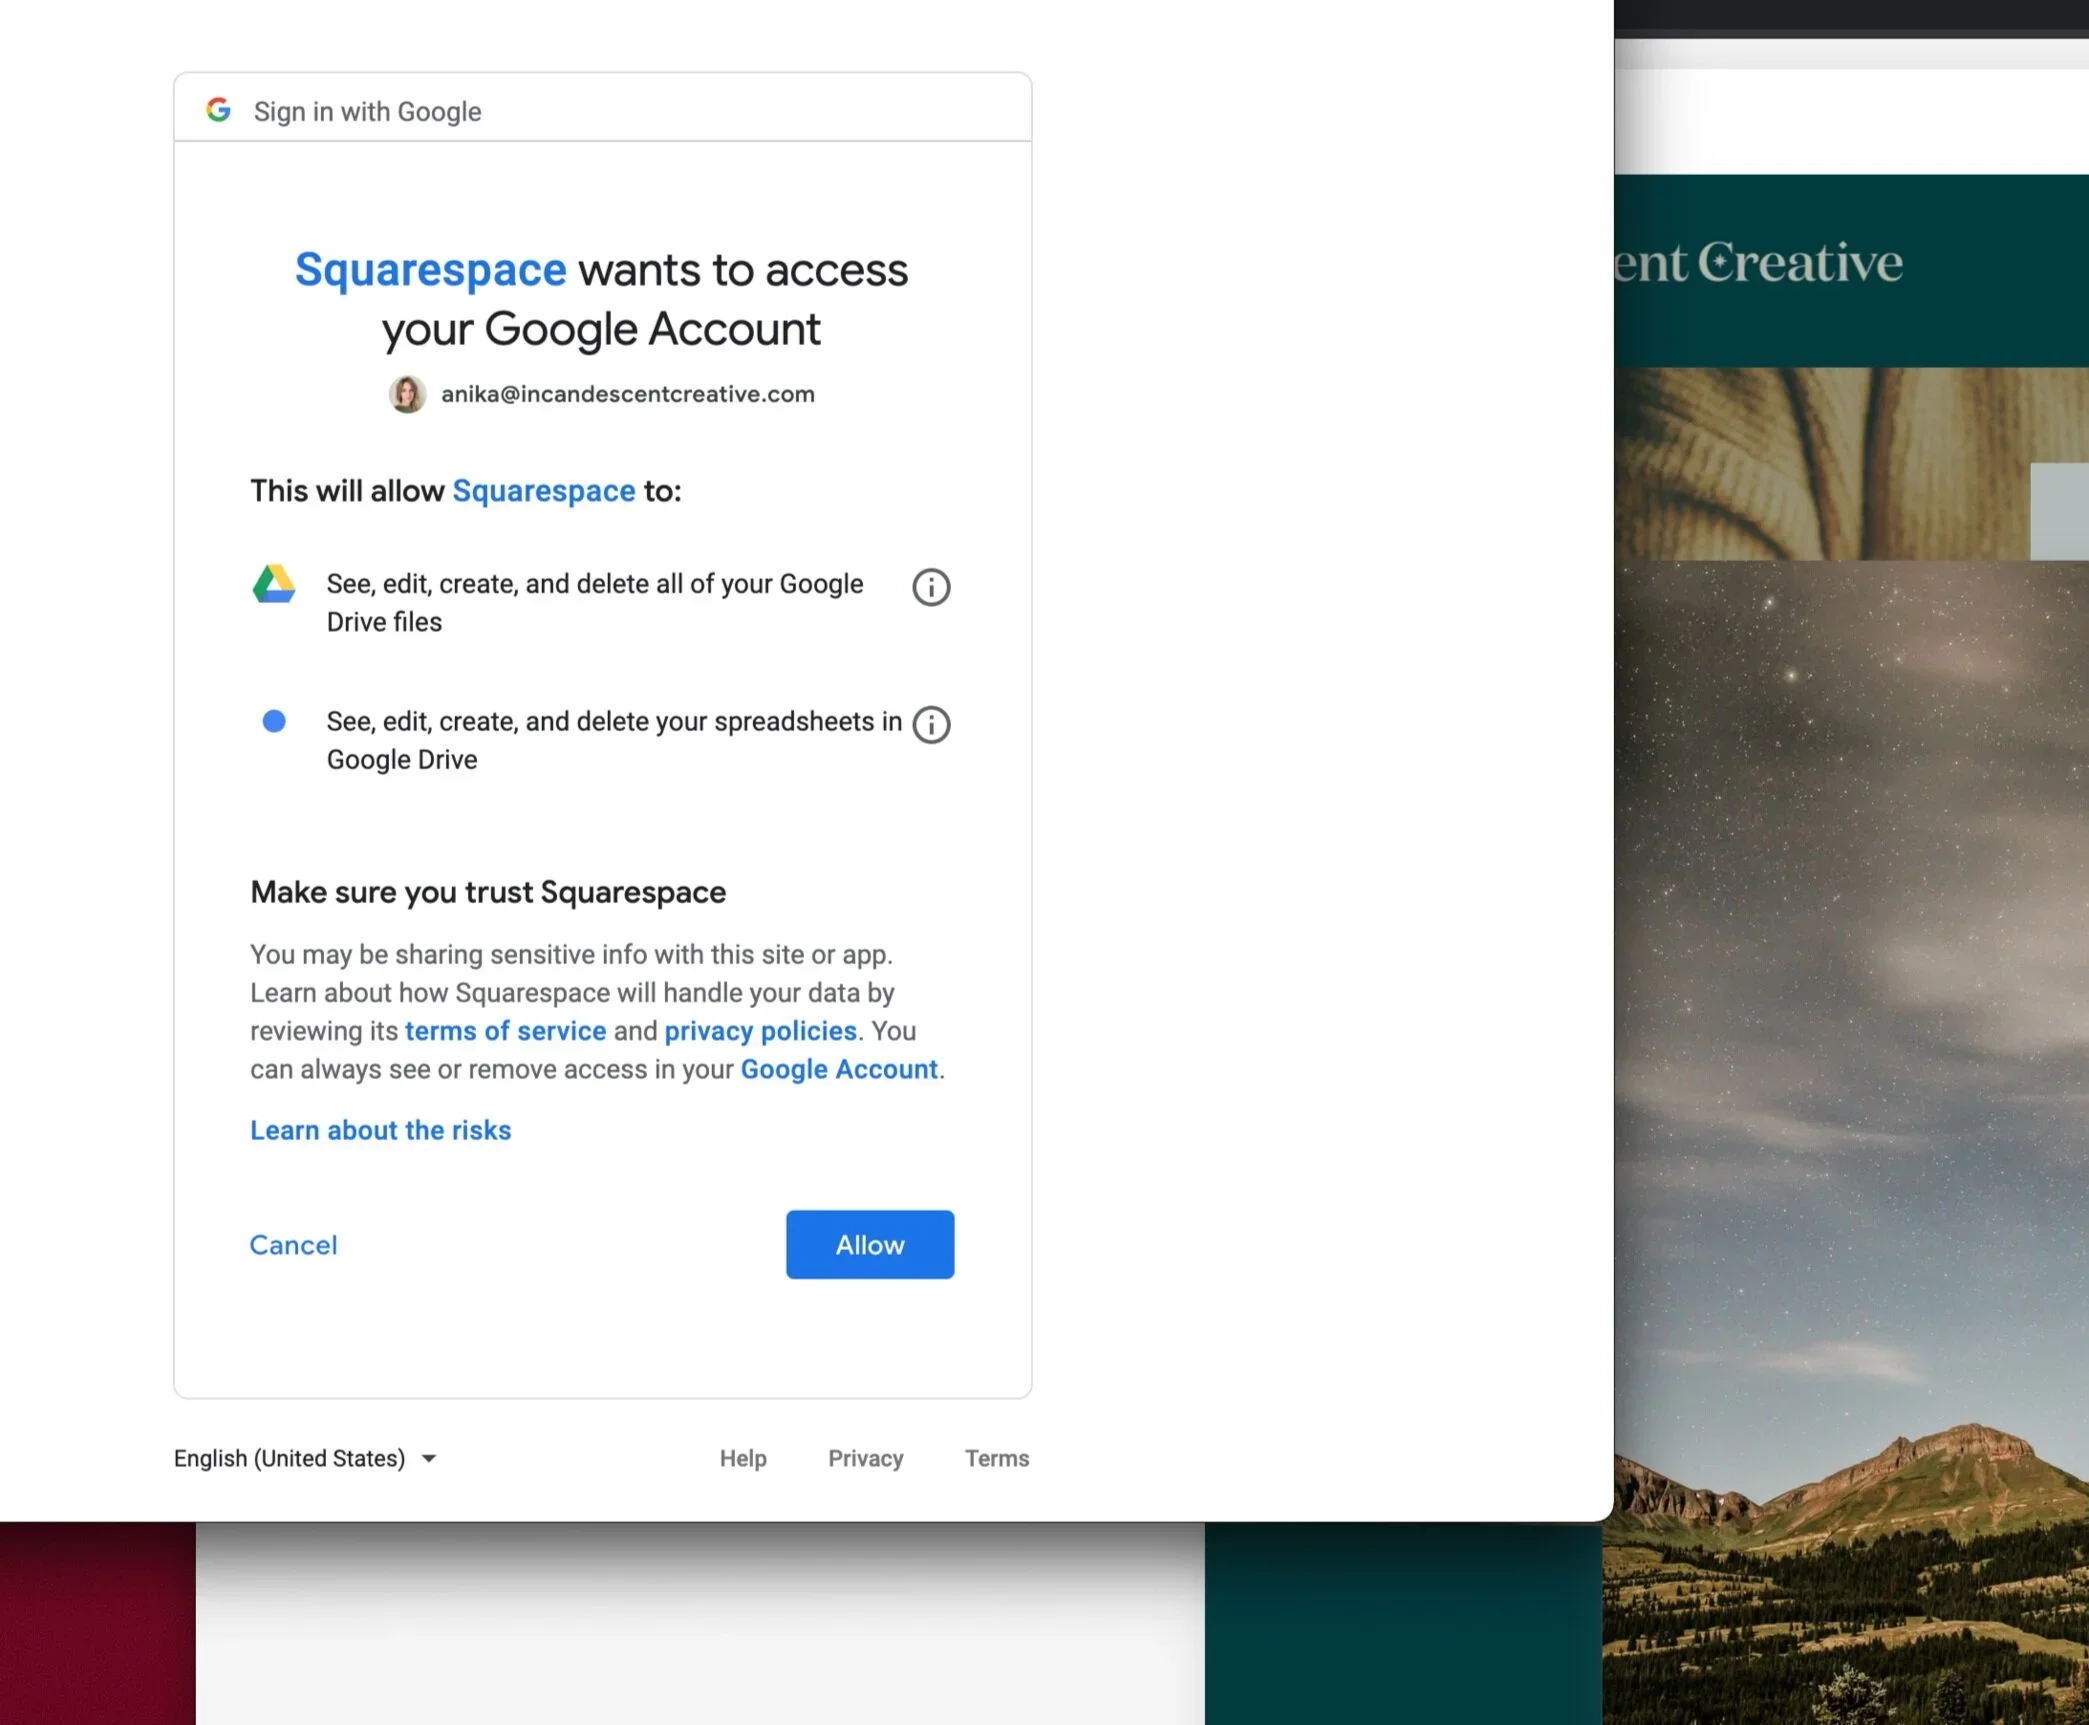
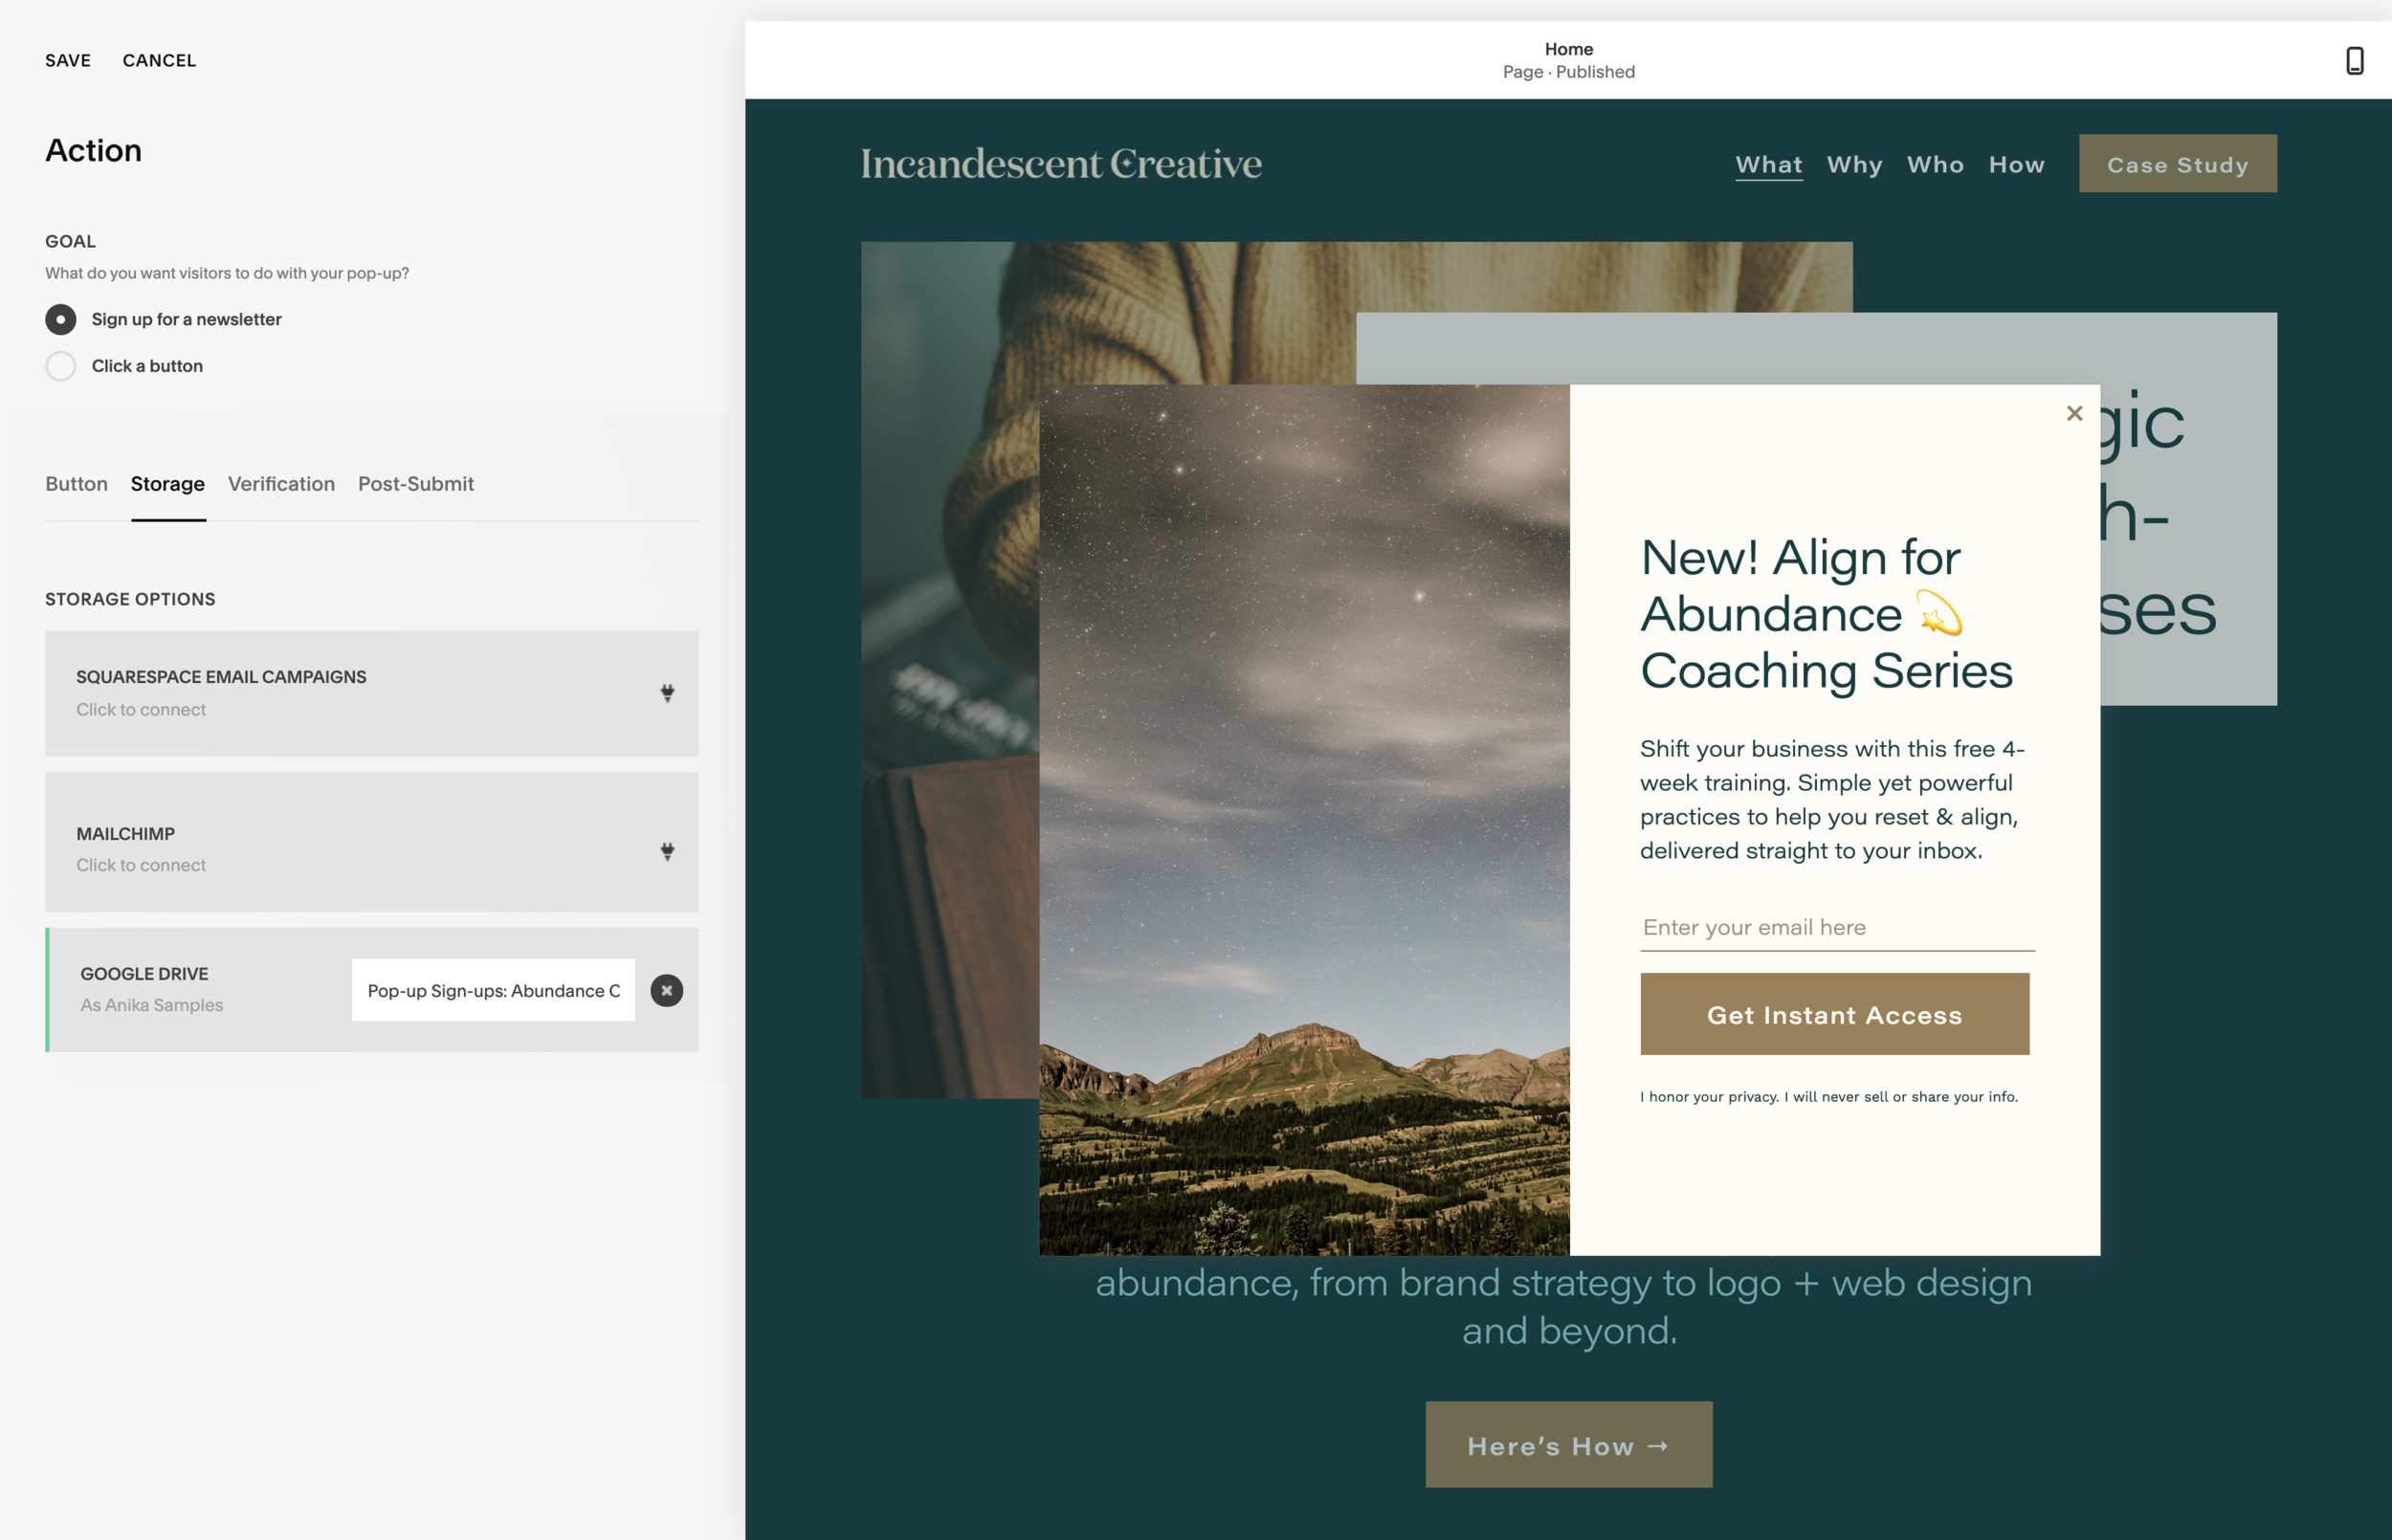
Under ‘Storage, ’ click to connect Google Drive. A separate window will open, prompting you to sign-in and then ask if you want to allow Squarespace to access your Google account. Click ‘Allow.’
You will then see a field to enter the name of a spreadsheet. This creates a new spreadsheet in your Google Drive account where emails from your subscribers will be saved.
I recommend entering a name that makes it clear what it’s for, so you don’t see a random spreadsheet and accidentally delete it later. I used “Pop-up Sign-ups: Abundance Coaching Series” for mine.
When you’re done, hit ‘Save.’
3) Set up a zap in Zapier
Now that you have the promotional pop-up set up in Squarespace, we need to connect the Google spreadsheet with your Kit account. To do that, we need Zapier.
(There’s gotta be a joke in here somewhere about how many apps it takes to change a lightbulb…)
Zapier is an automation tool that connects various web apps, like Google Sheets to Kit—which is exactly what we’re doing!
Once in Zapier, click the ‘Make a zap’ button. From there, you can select a trigger. For this, we want to select Google Sheets.
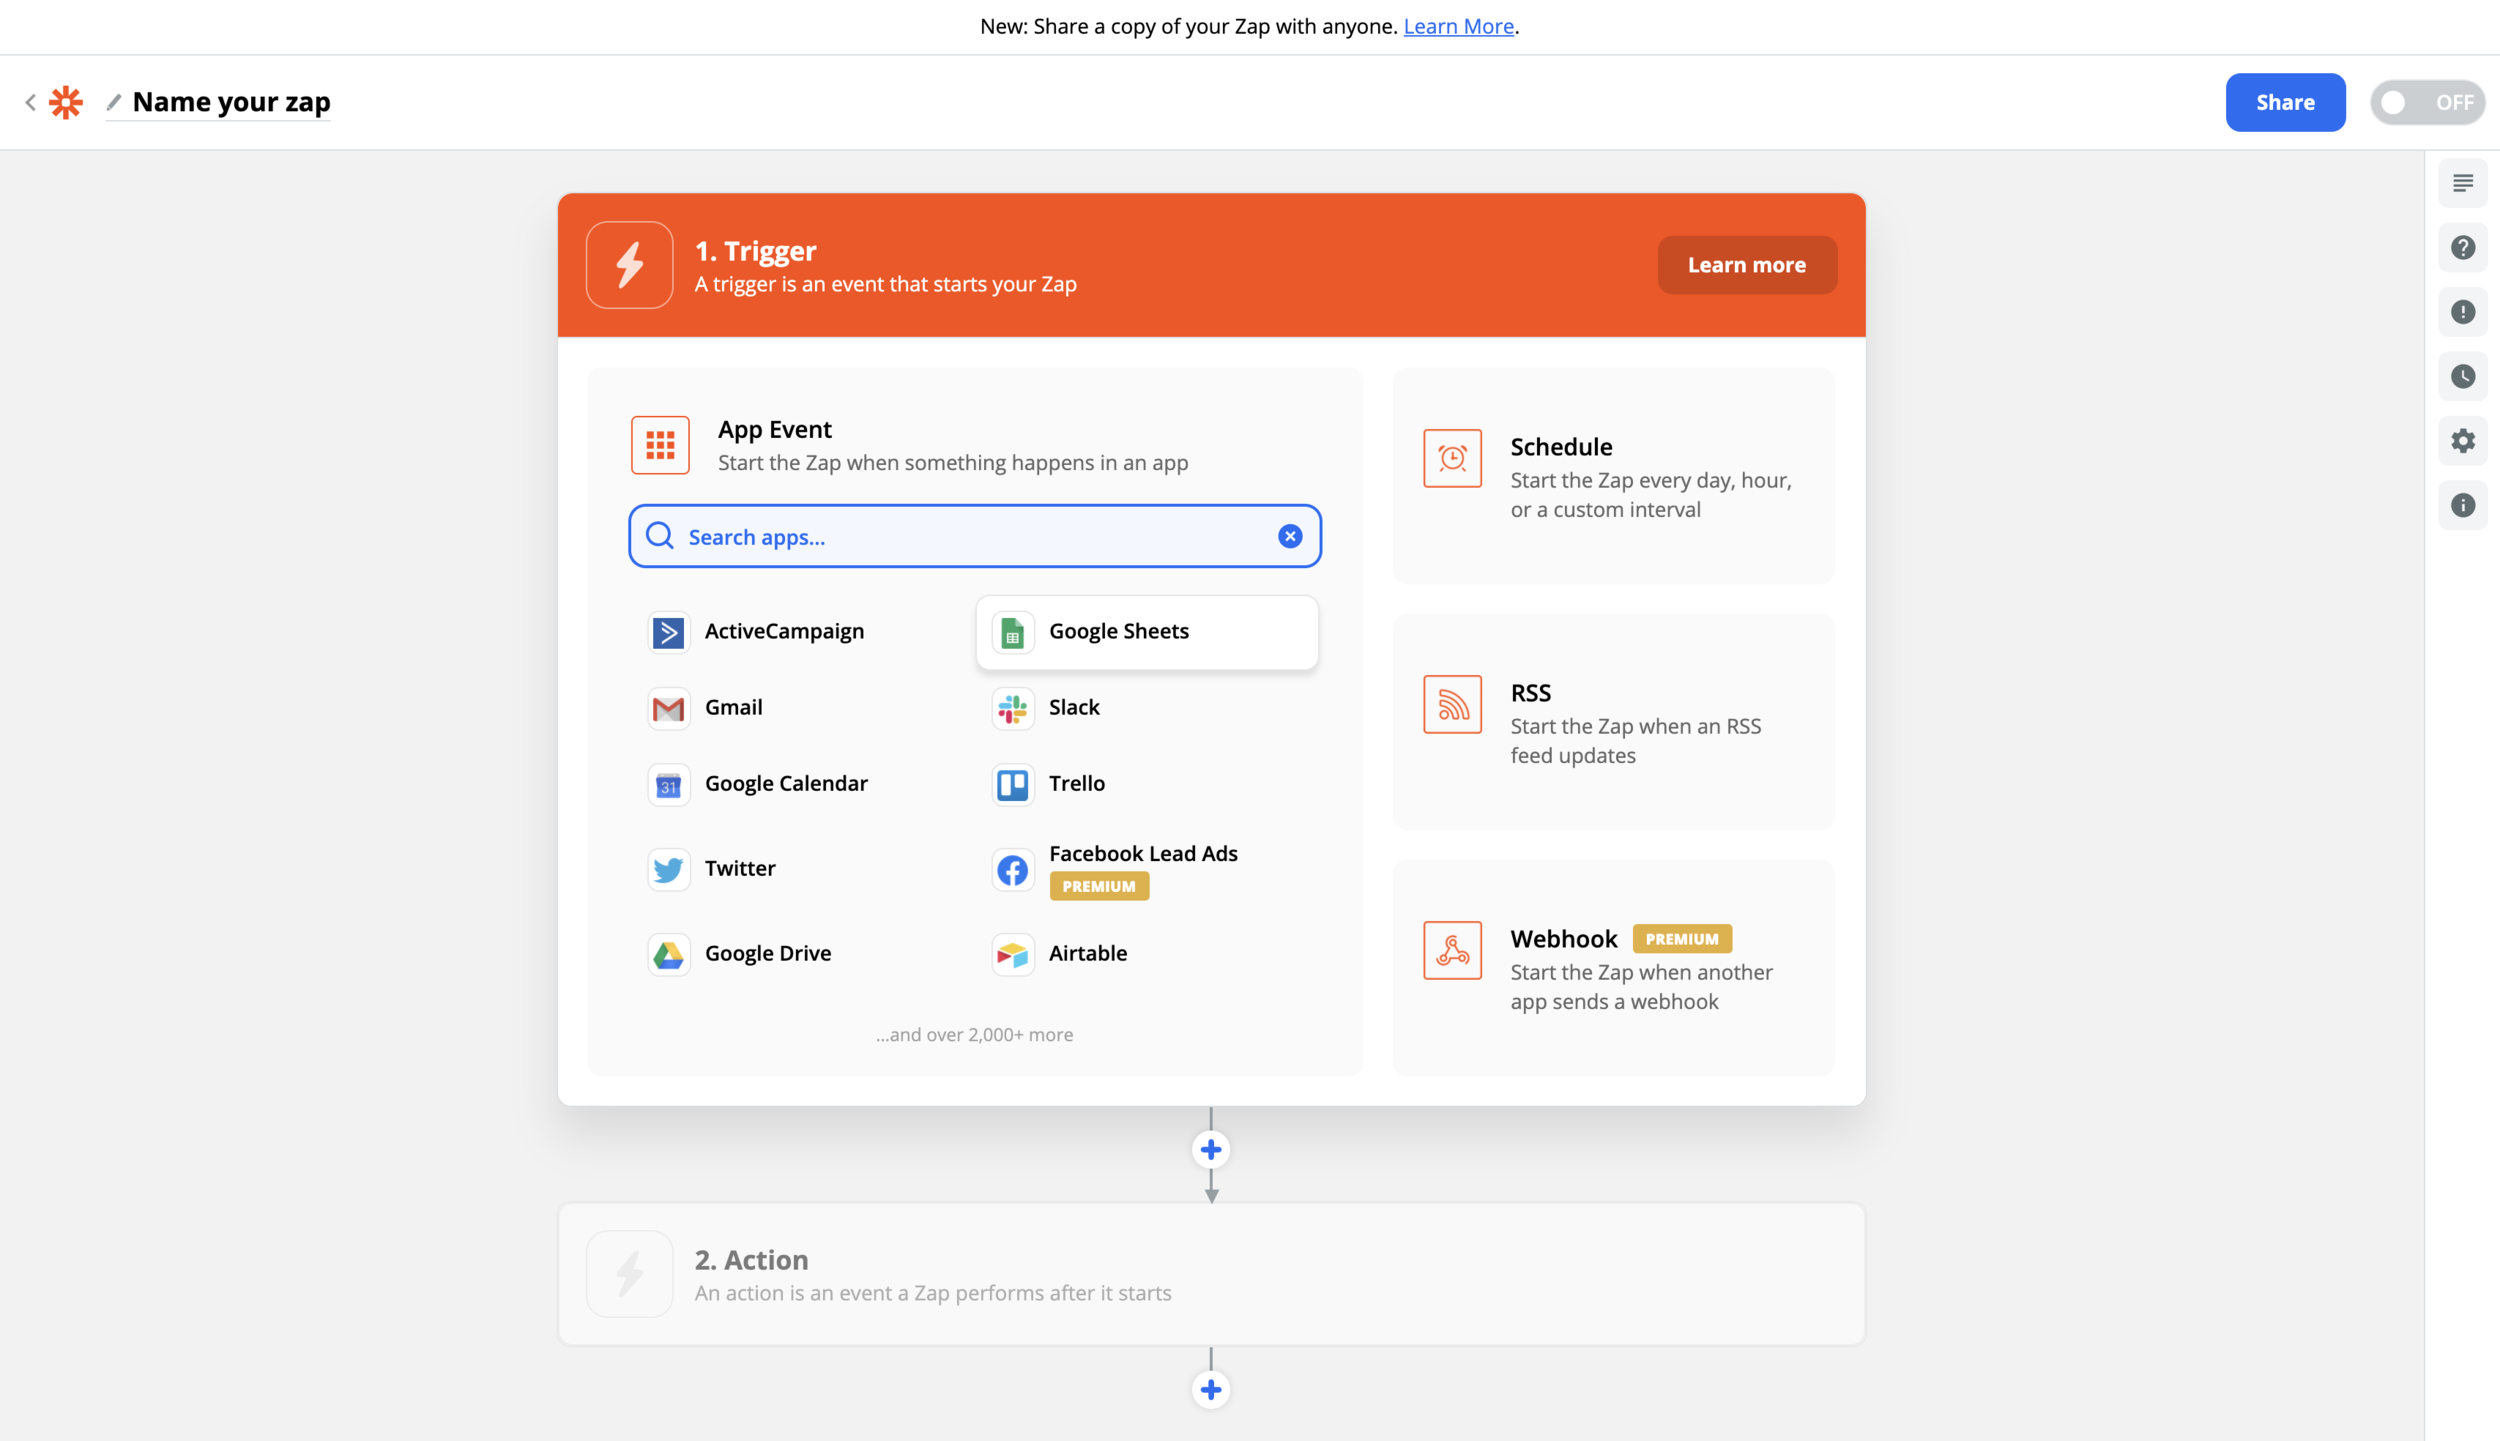
For the trigger event, we want to select ‘New spreadsheet row’ and then click ‘Continue.’
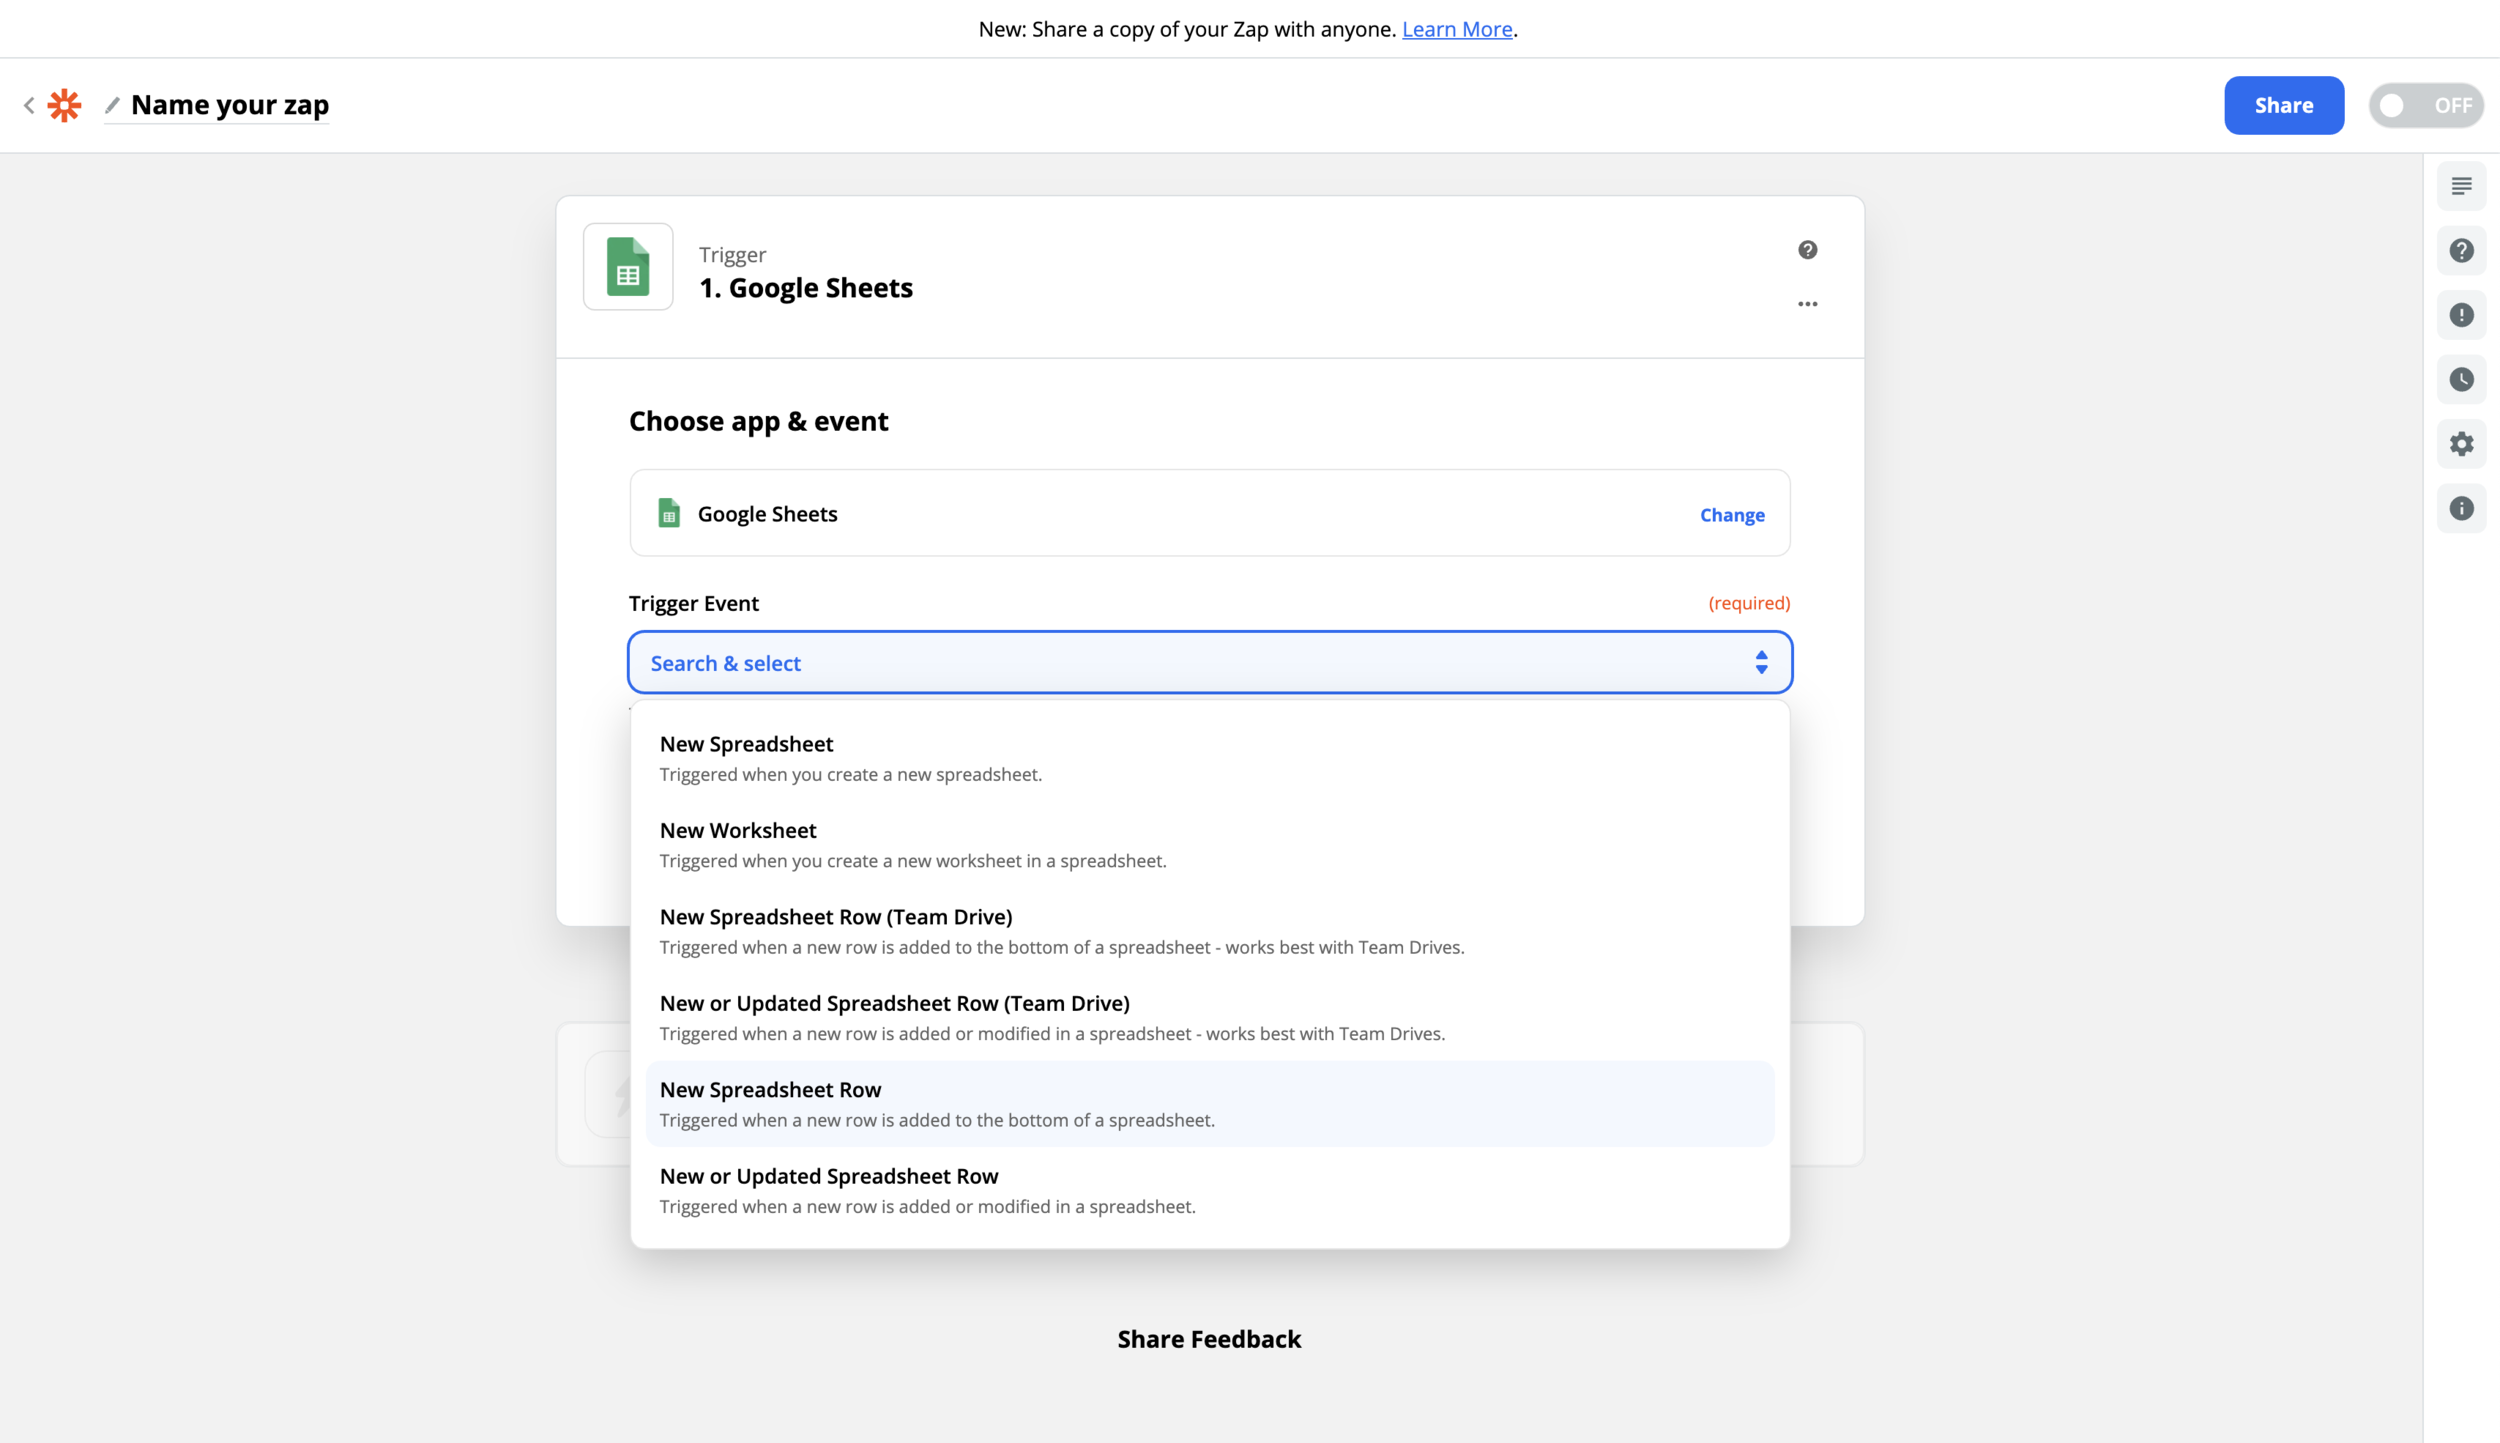
From there, choose the Google Sheets account. This is the Google Drive account that you connected to Squarespace earlier.
Then click ‘Continue.’
Locate the spreadsheet you named earlier and then select ‘Sheet1’ (this should be the only option you see available). Hit ‘Continue.’
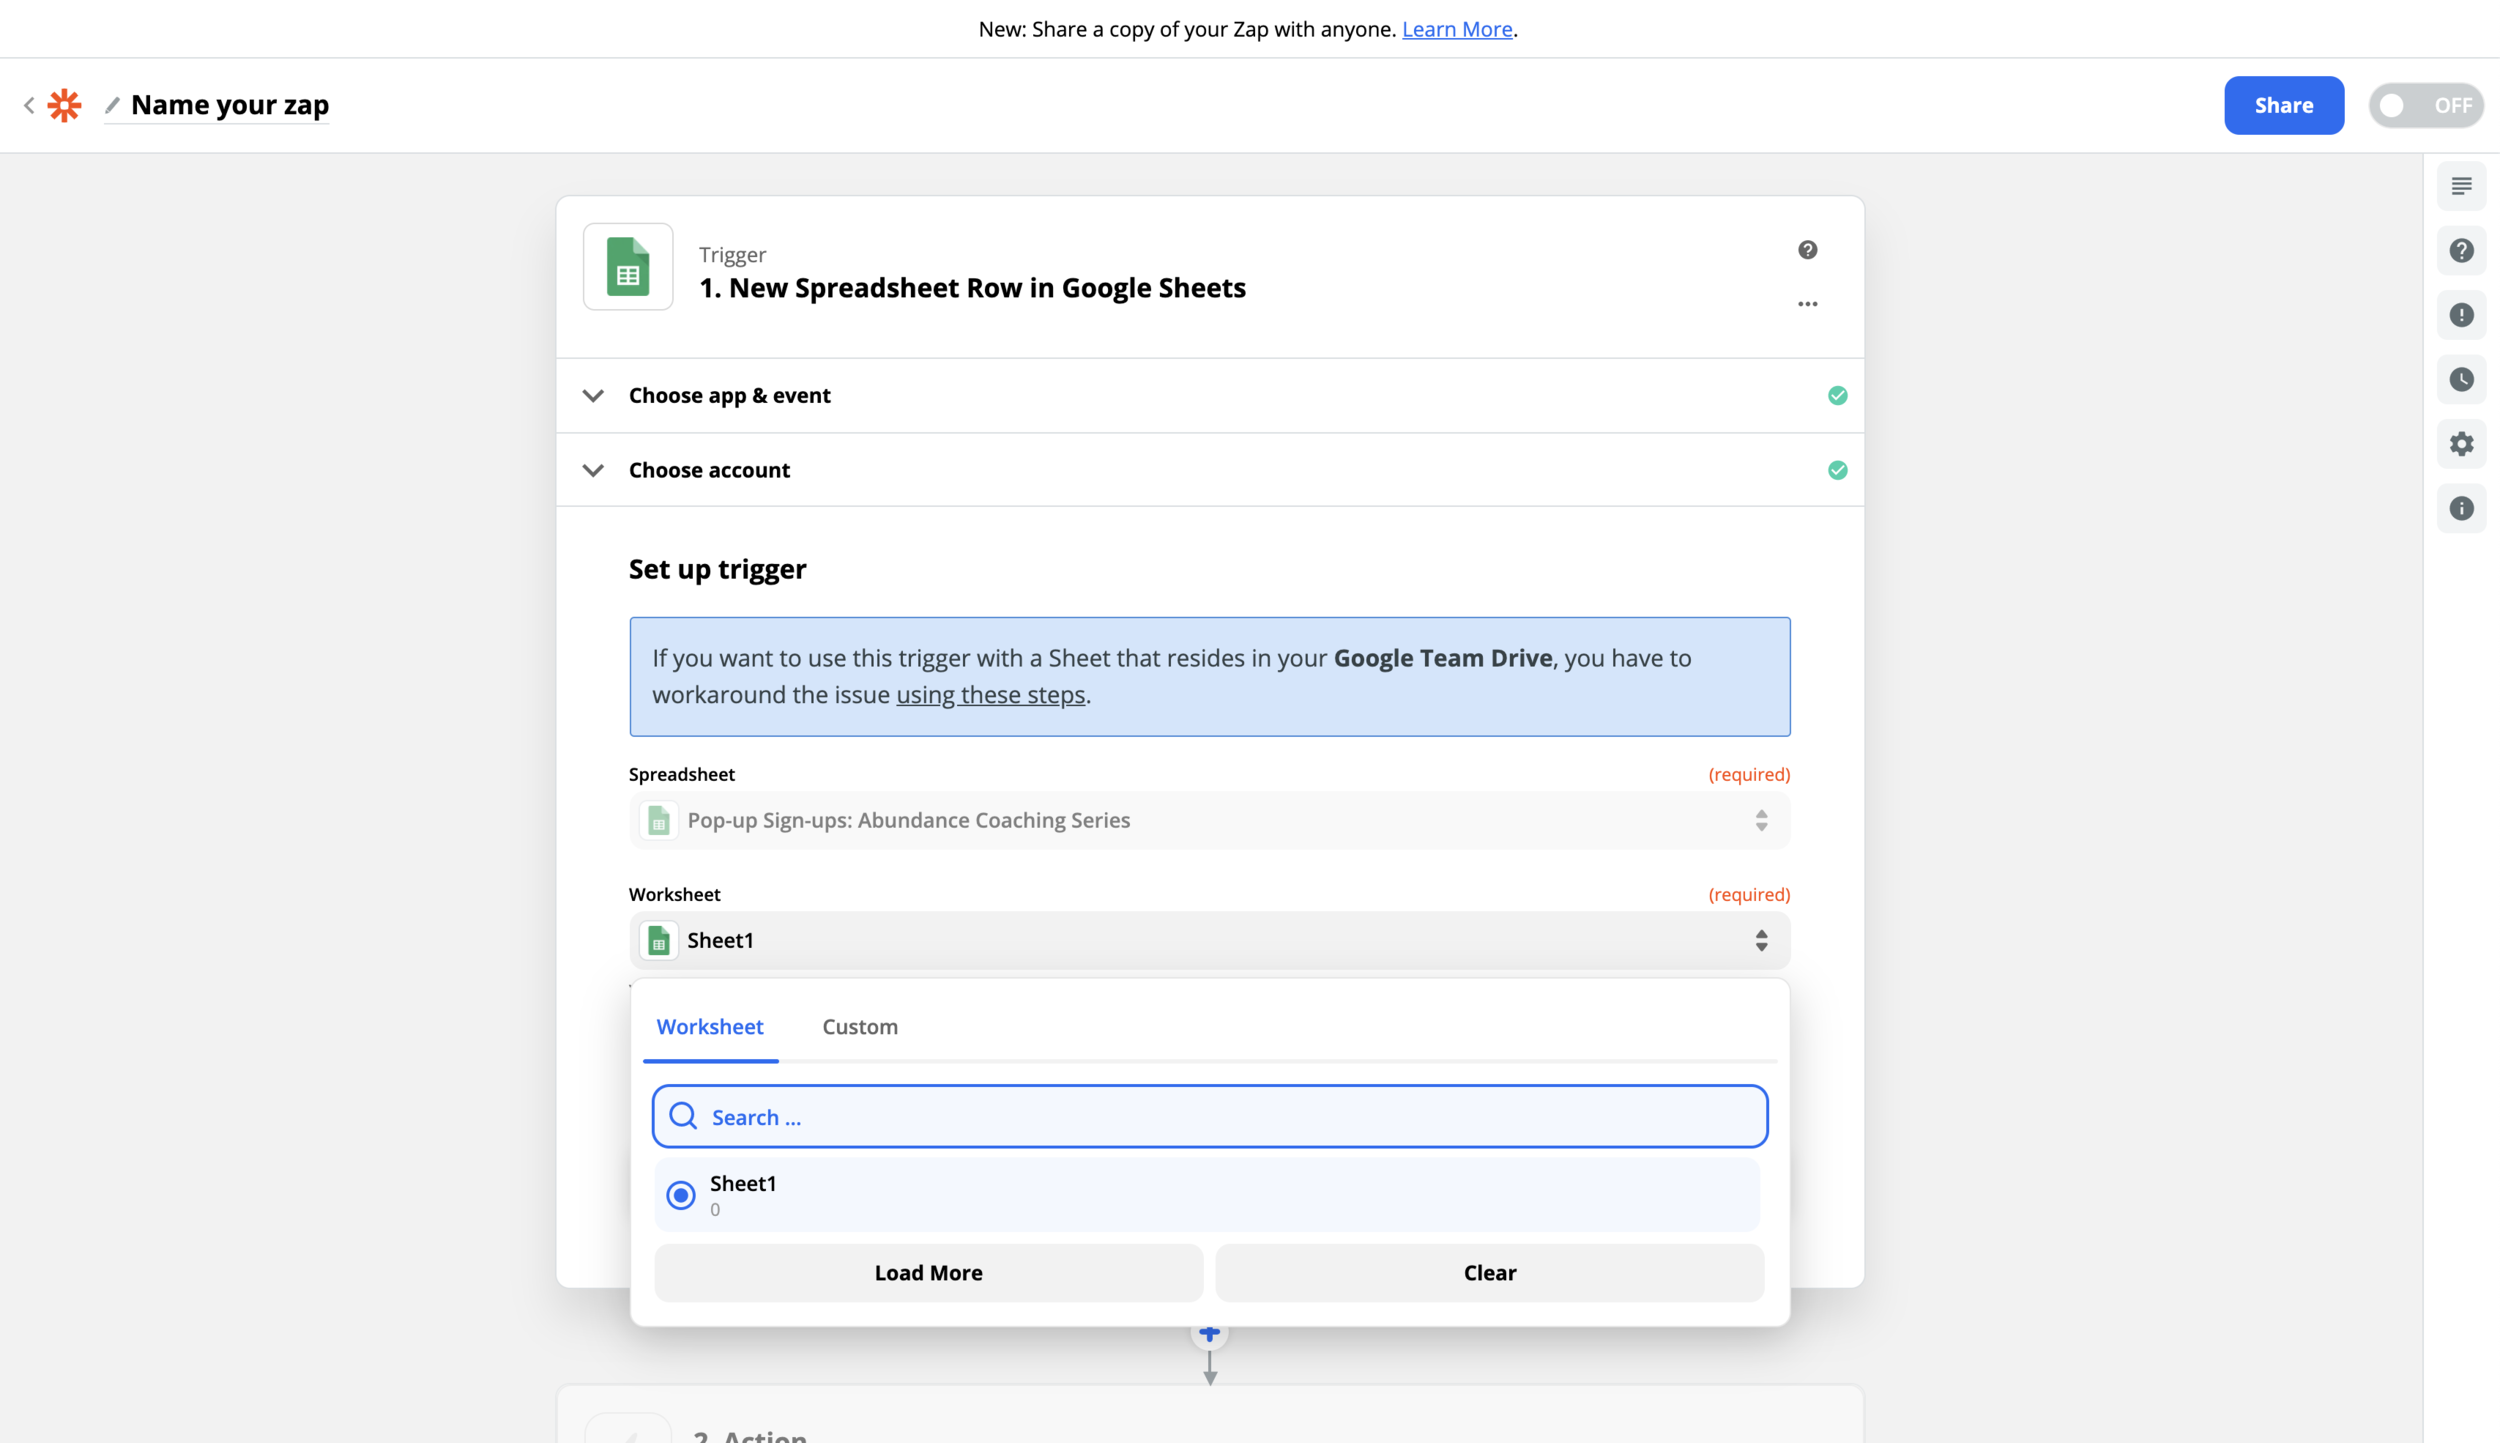
Now, hop over to the spreadsheet in your Google Drive and enter an email address you can use to test, directly underneath where it says ‘Email address’ in column B.
Test the trigger and once confirmed, click ‘Continue.’
Now we’re going to enter the Action. Select Kit (or the email service you use).
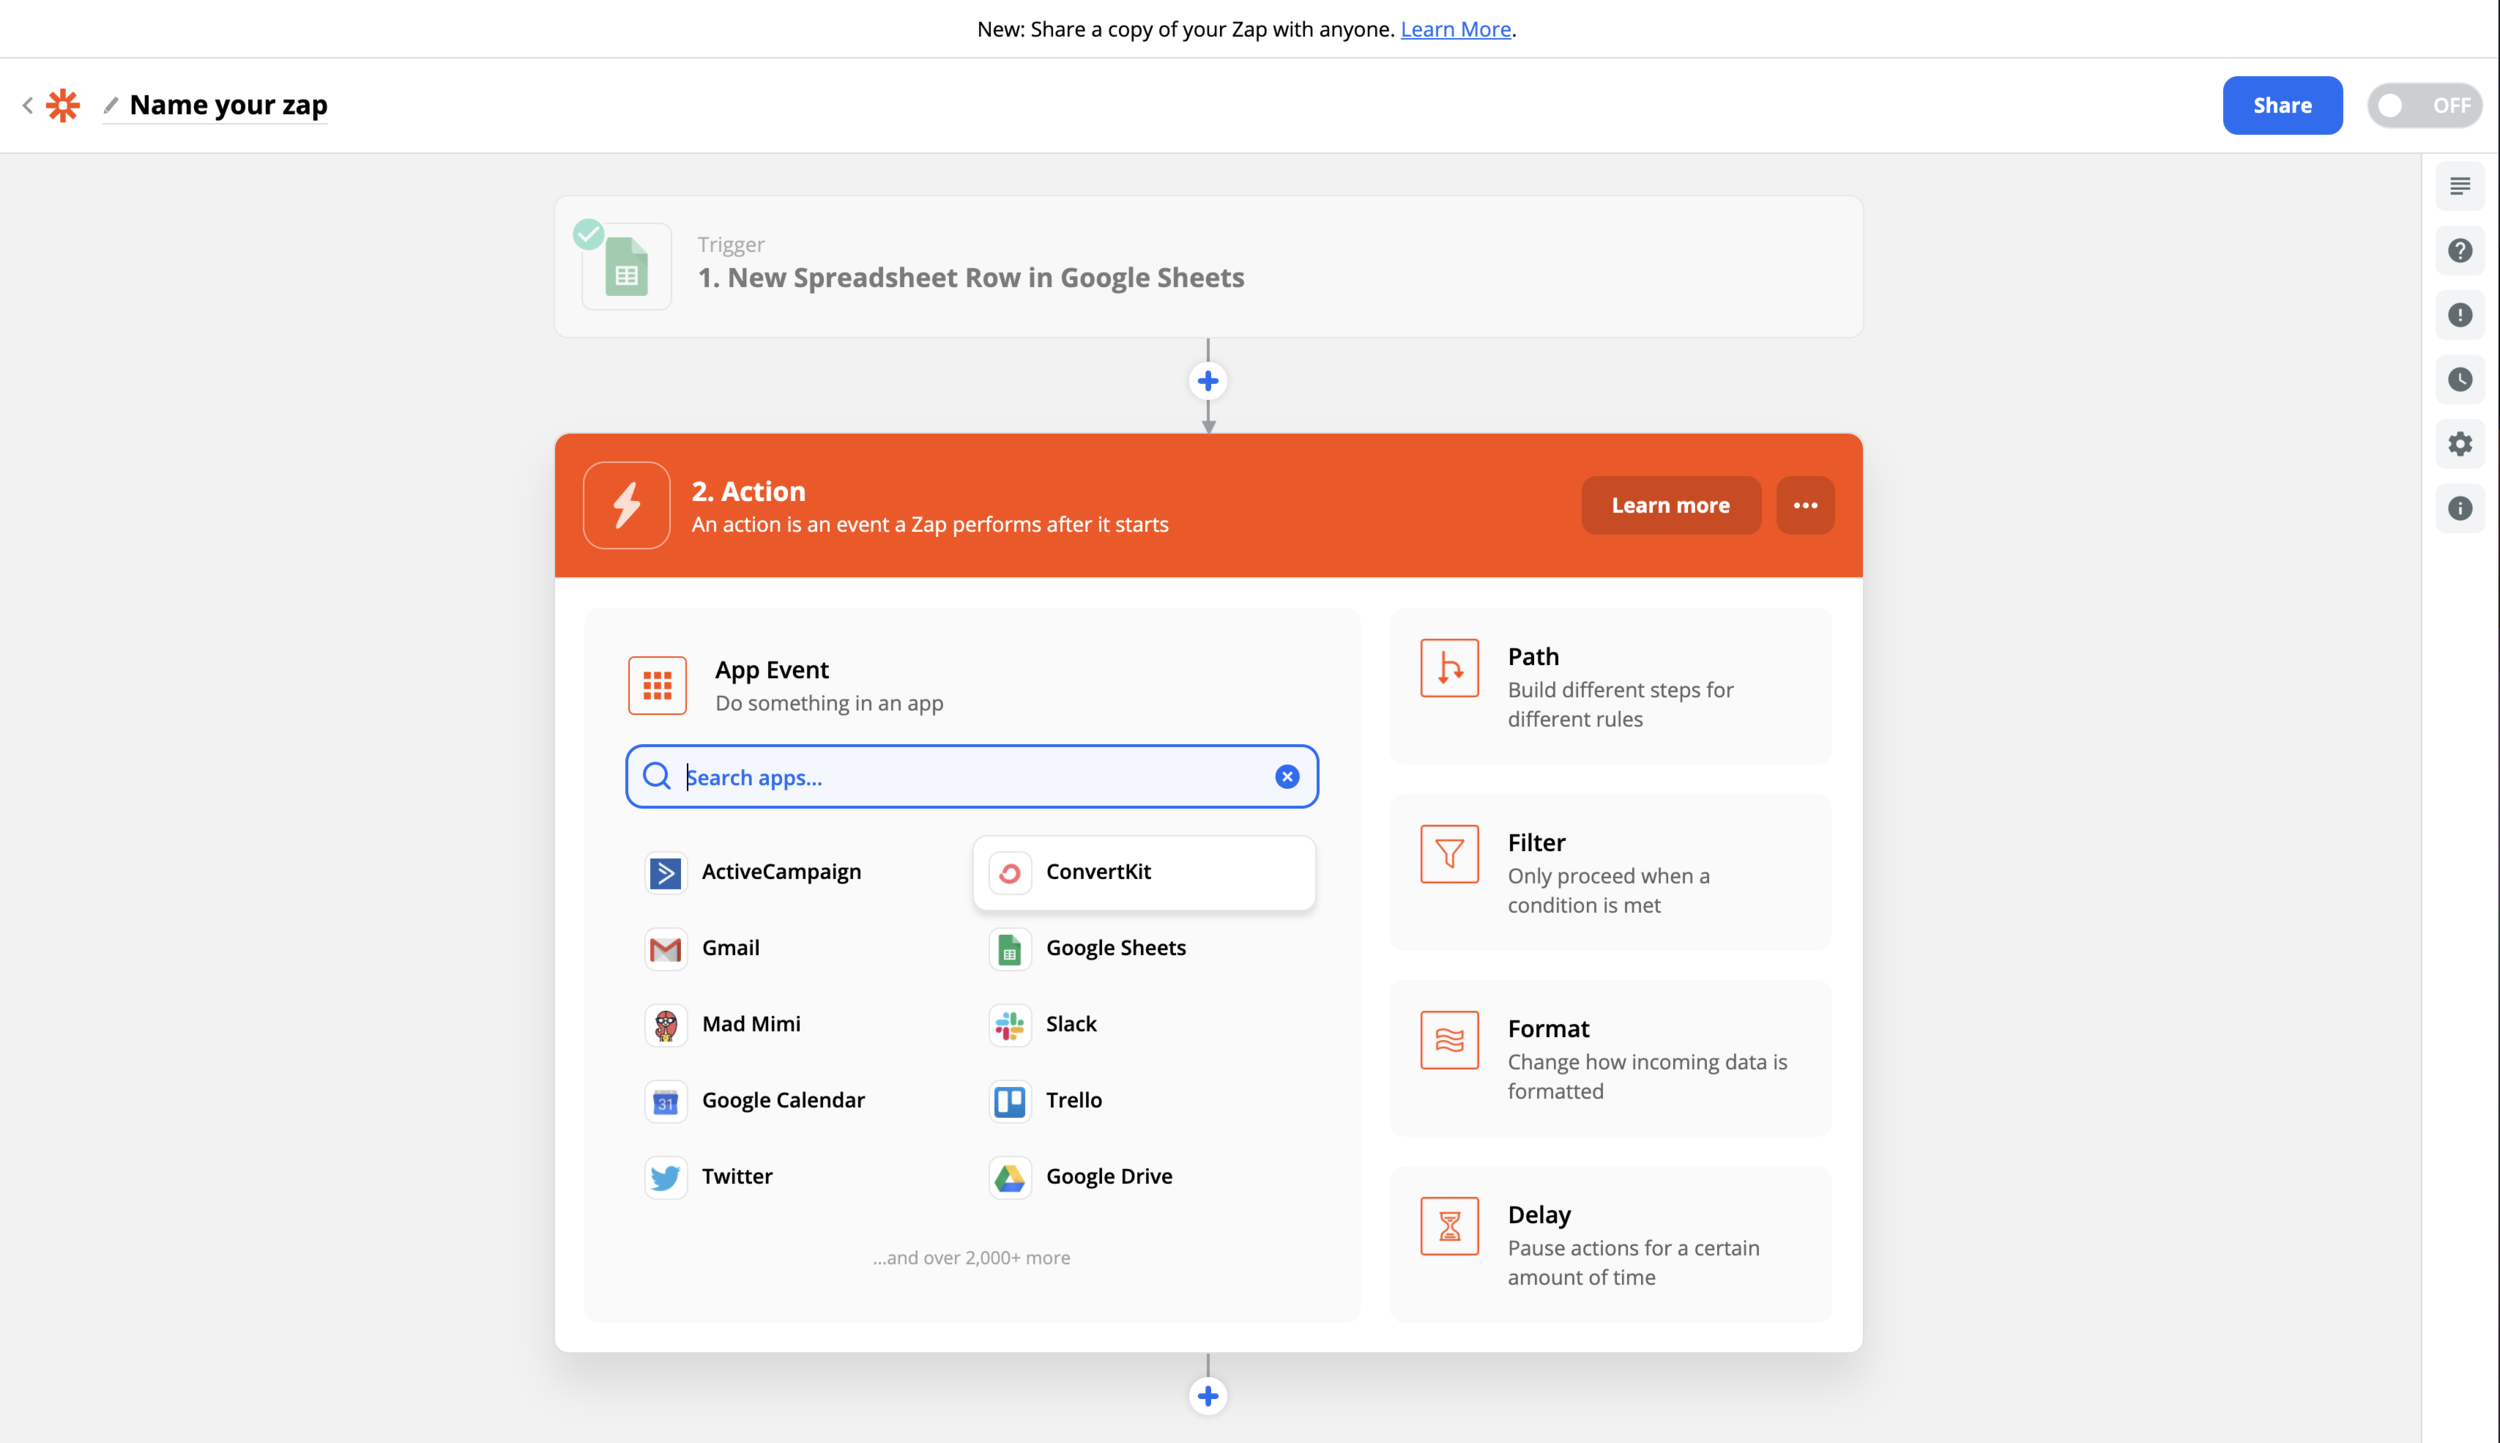
For the Action Event, we want to choose ‘Add Subscriber to Sequence’ then ‘Continue.’
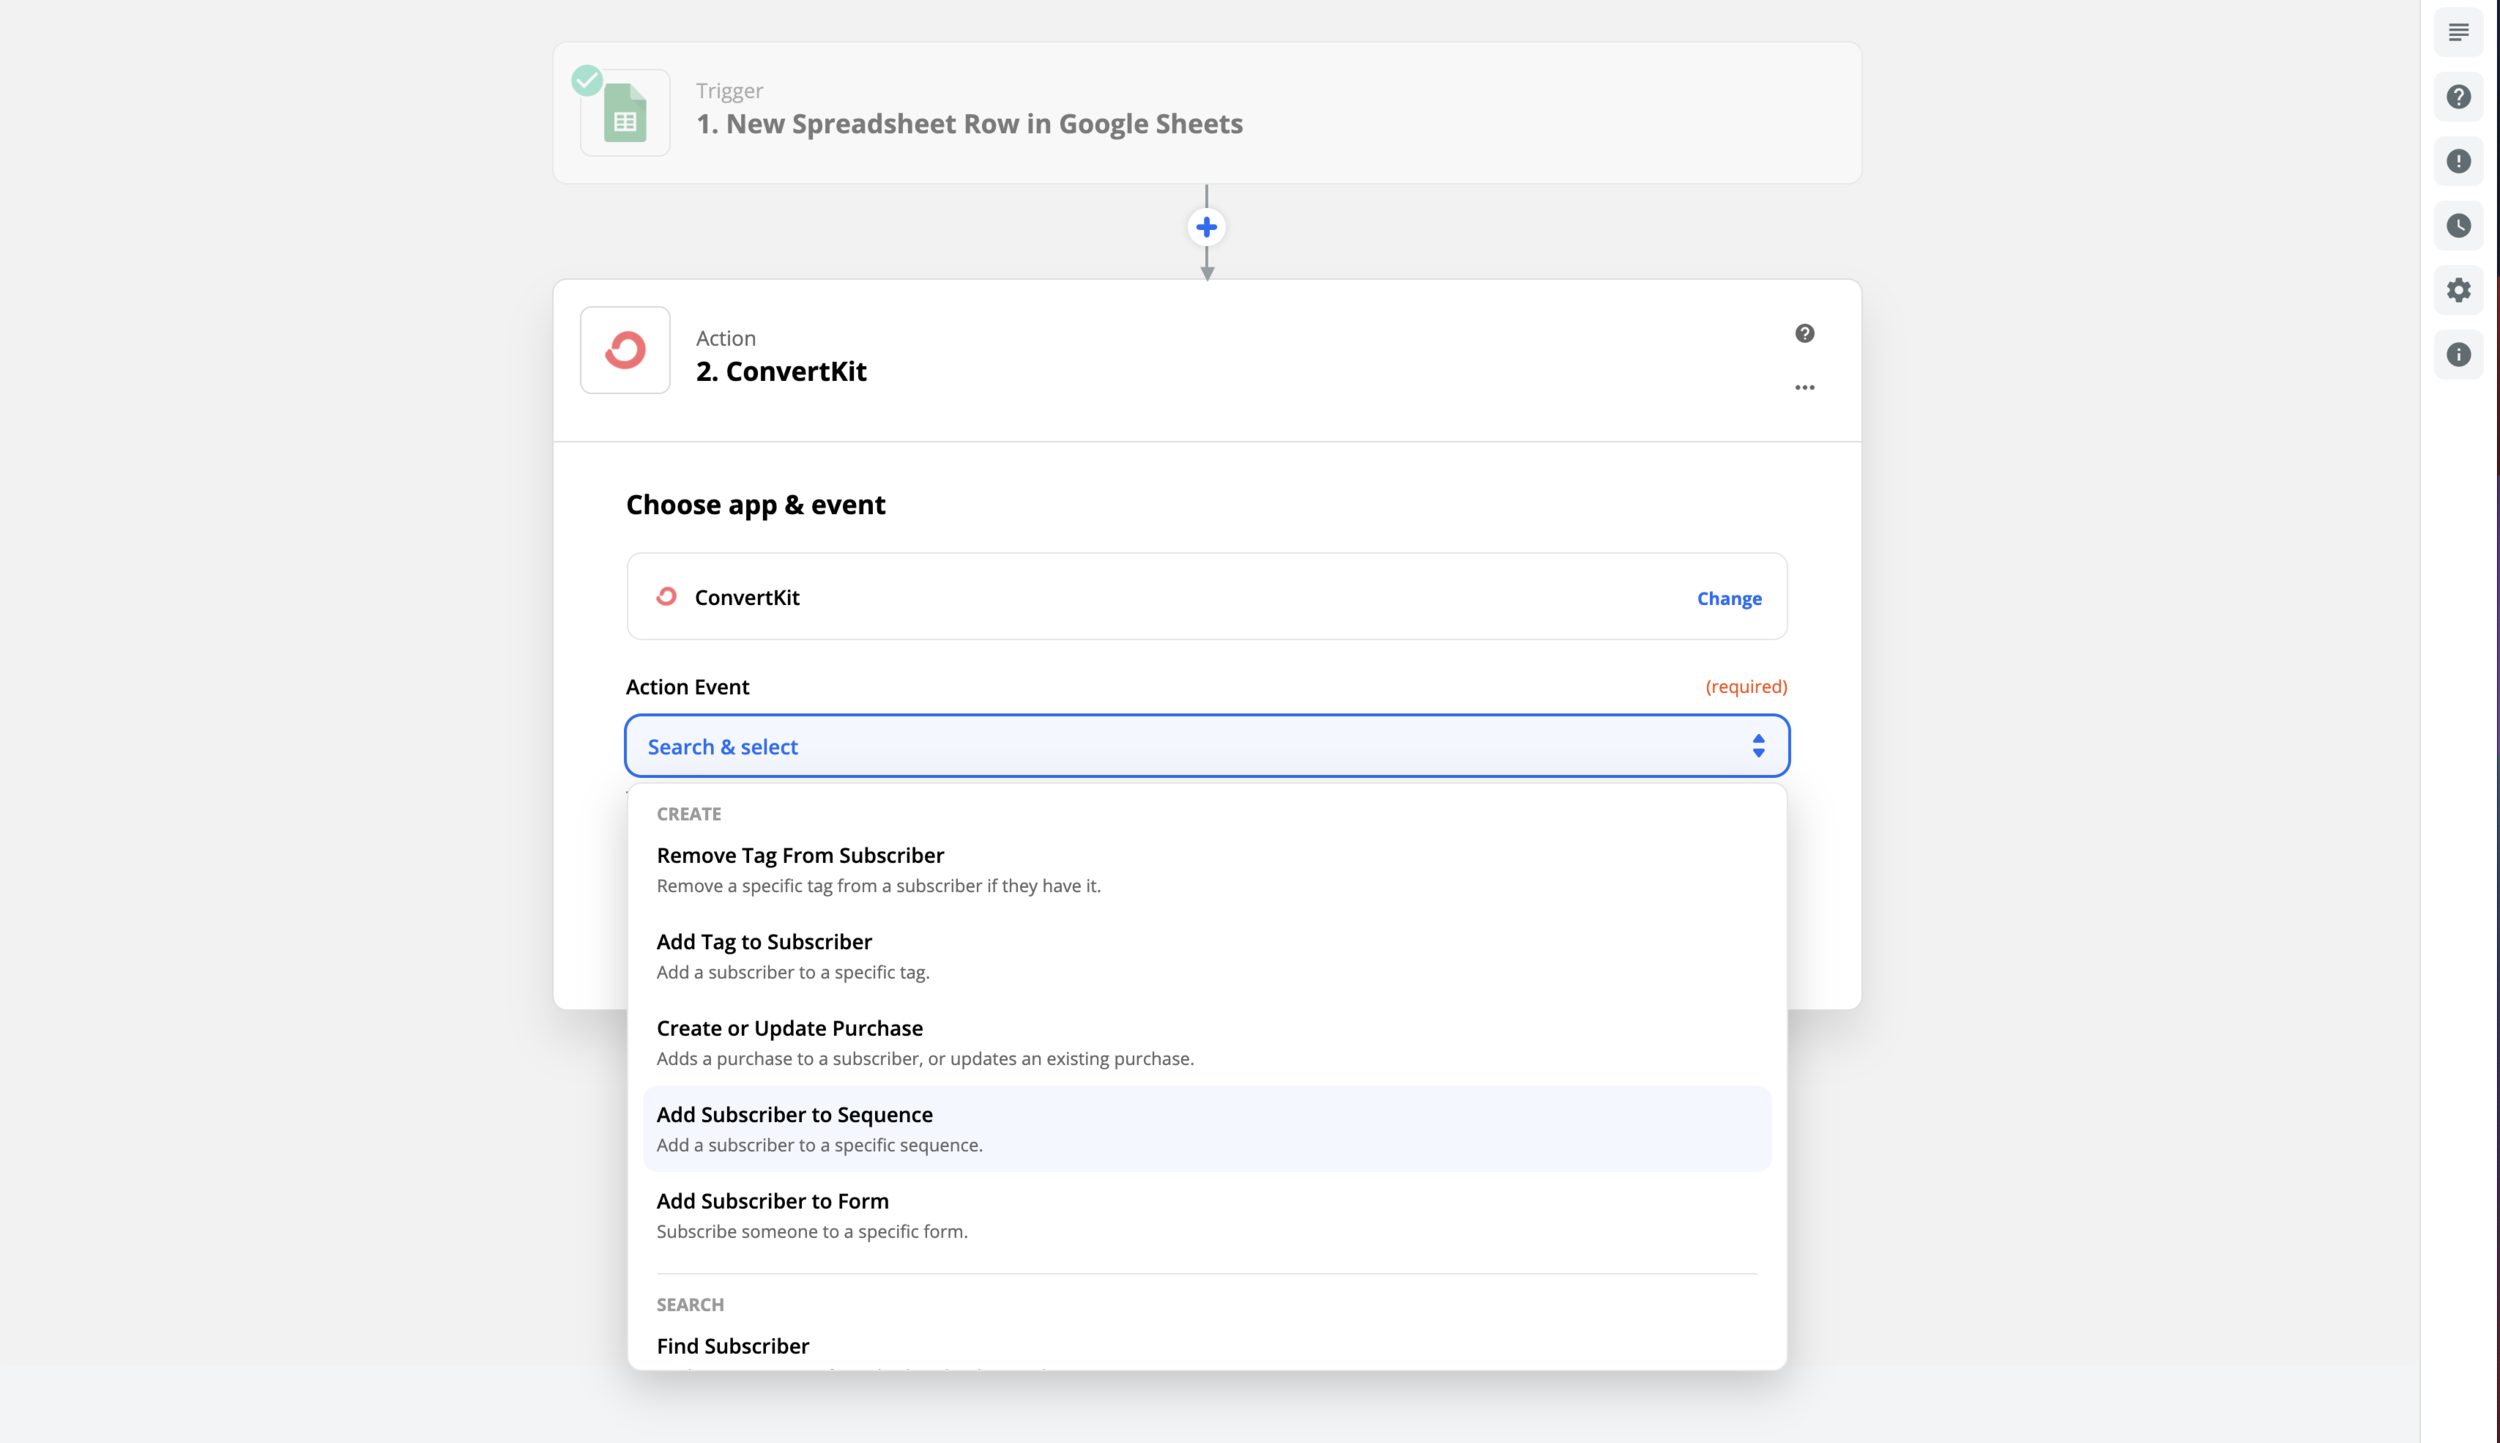
Select or connect your Kit account via the next step. And you guessed it—hit ‘Continue.’
Locate the sequence you want to assign subscribers to and then select the email address you used to test. (This just tells Zapier what field to look for. It will populate with the new email addresses as they’re added.)
Leave the name field blank (Squarespace doesn’t give the option to collect name on promotional pop-ups) and click ‘Continue.’
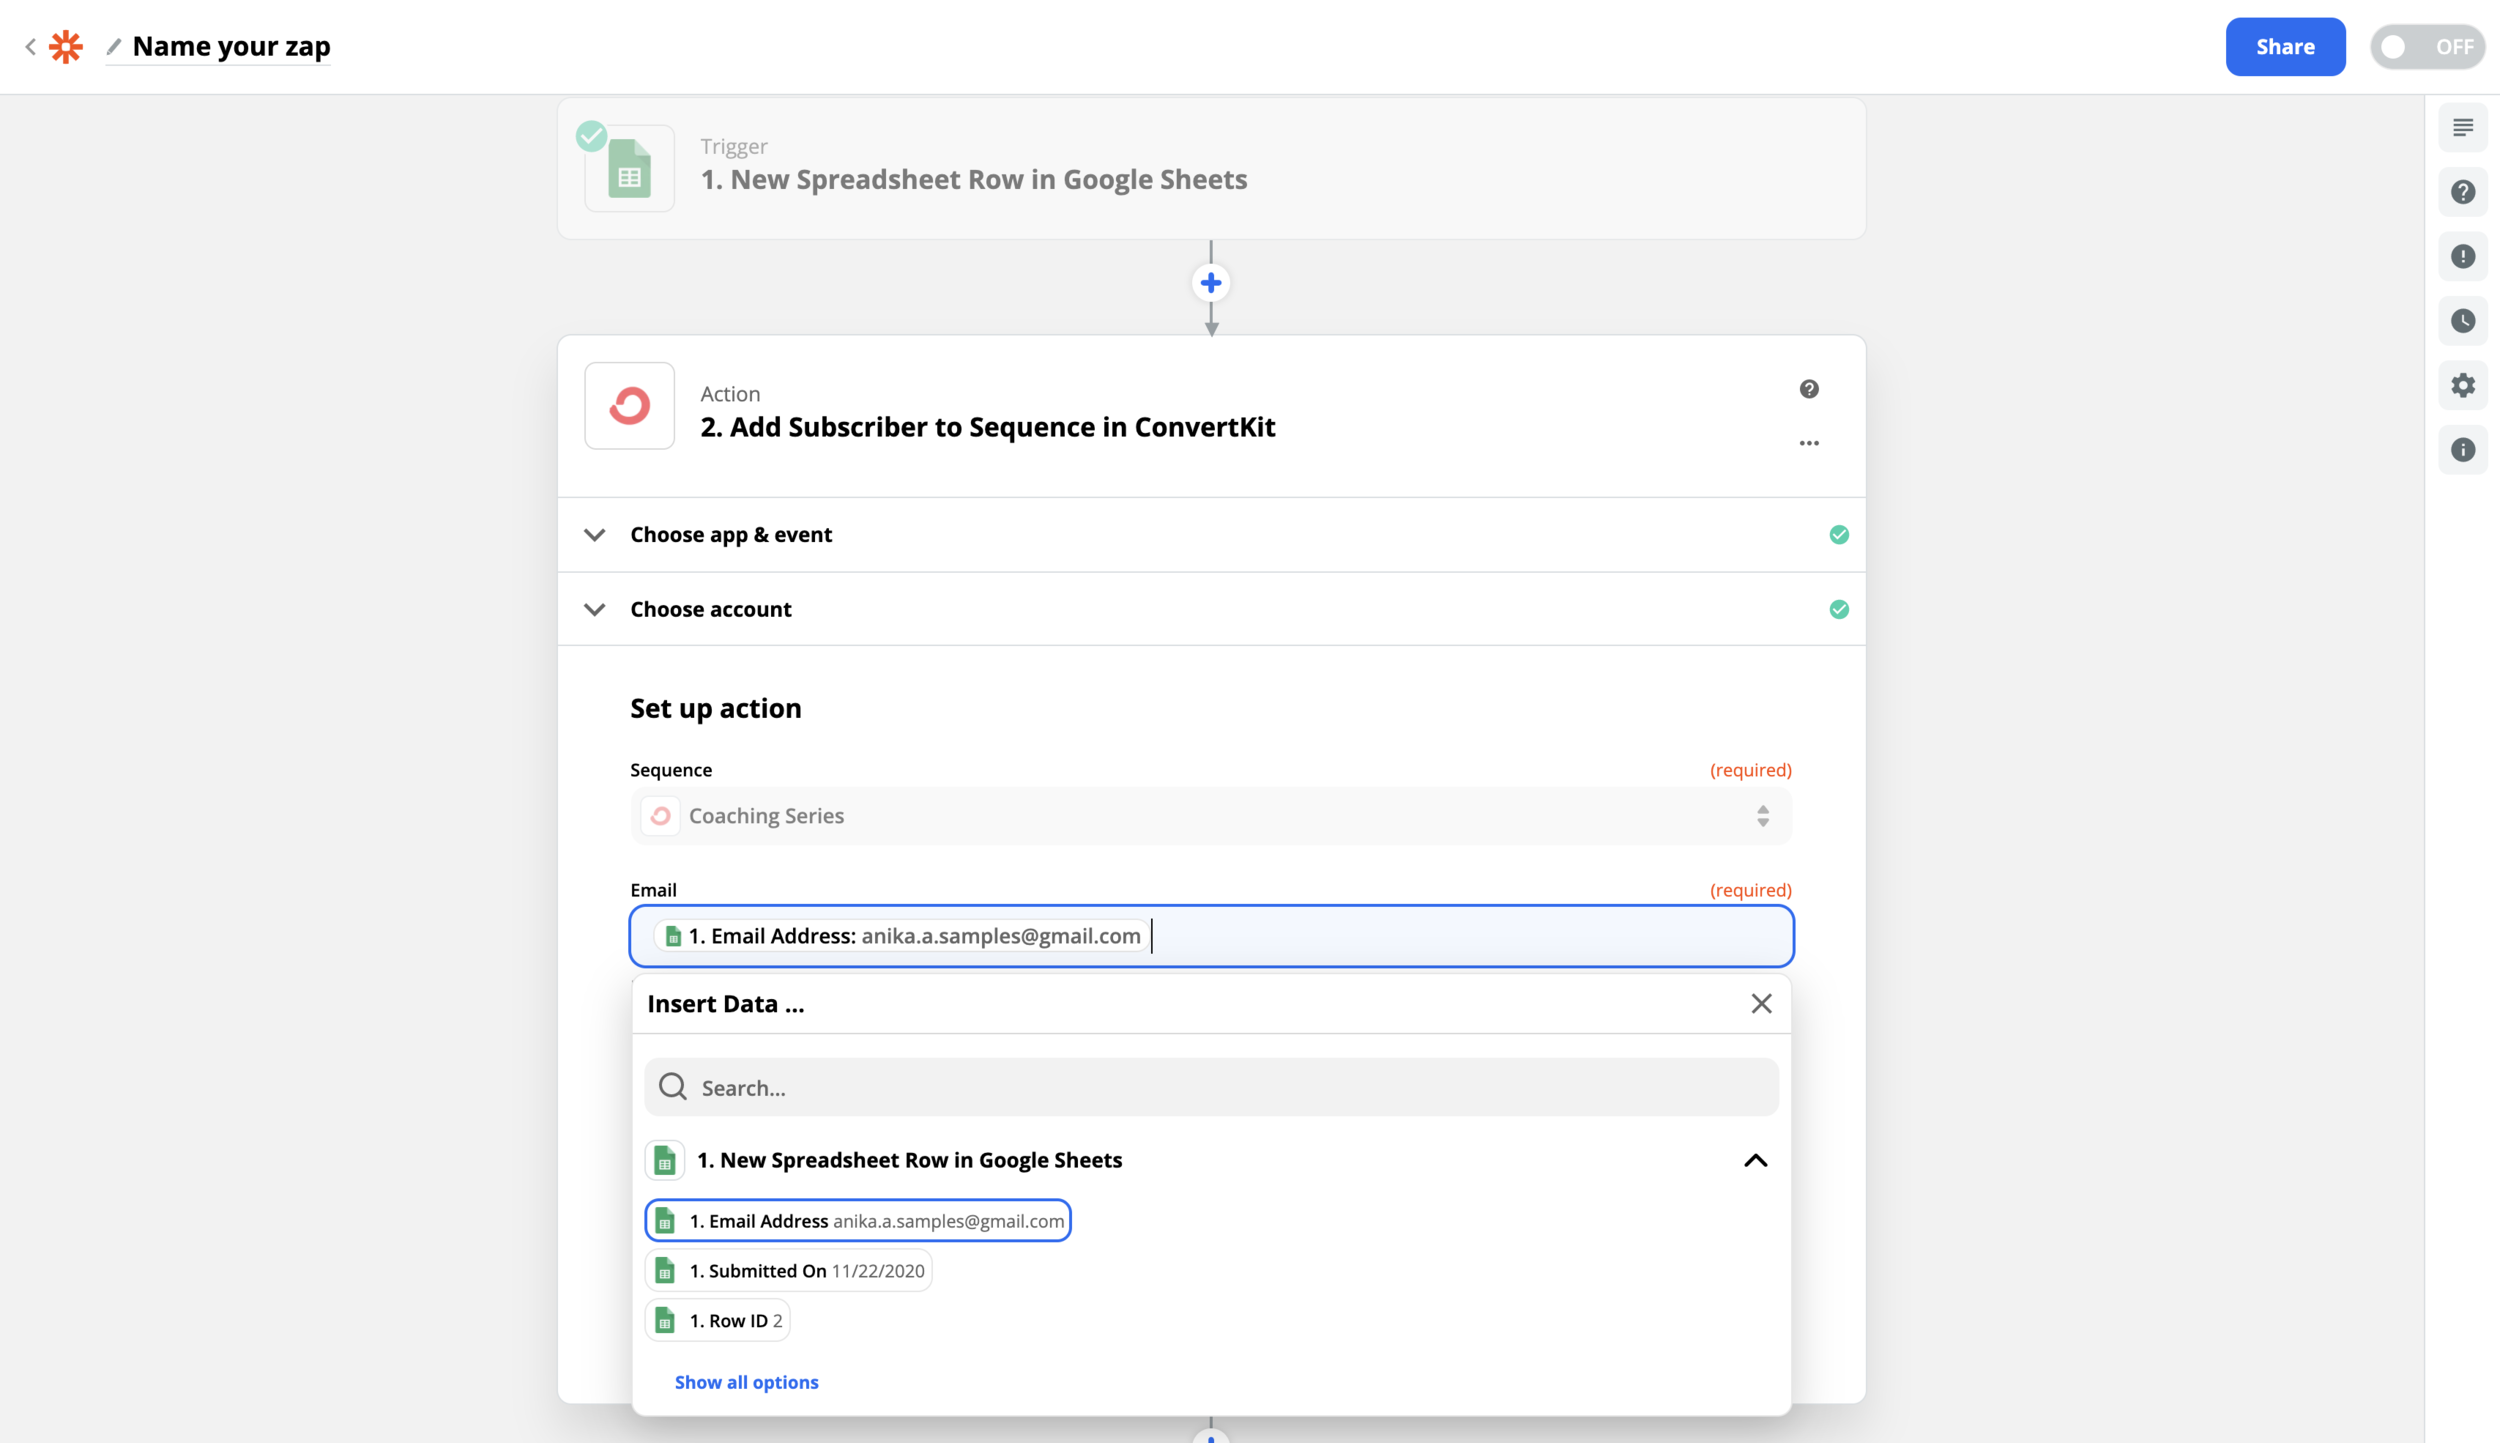
Test the action and confirm that the email was added to the sequence in ConvertKit. (This can take up to 3 minutes.)
Once confirmed, turn on the Zap and you. are. done! 🎉 🎉 🎉
For extra credit, I highly recommend testing the full flow by entering your email address in the pop-up and making sure you receive the emails from your sequence.
Once that’s confirmed, then you are golden, my friend.